Autoexec Launch Options
As we all know, CSGO brings an opportunity to its fans to experiment with and customize a lot of features inside the game. Players are free to choose different settings for their crosshairs, resolution, video settings, and many other things.
We also know that the changes we want are possible through the console, but those changes last only until the next reboot of the game. This fact, in particular, can be very irritating, since players have to retype their favorite commands every time they start the game. Because of this issue, they have found the solution in “Autoexec”.
What does it mean to use Autoexec? Practically, it is like putting all of your books in one backpack instead of carrying your books around individually. What that means is that you make a file that contains all of your previously saved settings, and store it somewhere within your computer, or a platform online. That way you can access it anytime you want to play, and can modify your settings without having to do all of the boring retyping.
One practical piece of advice – if you are not sure which options to use, you are free to check out some of the professionals who test them daily in live combat. That way you’ll know that there are people way more skilled than you who have done the testing for you. All you have to do is select one of the many that are already awaiting.
Now that you know what Autoexec is, you should also know how to create one of your own. Practically, it shouldn’t be too complicated if you just follow the right guidelines. Some of you may have more experience with writing your own commands and options, but do not be worried – after a little bit of practice, it should be quite easy to get a grasp on it and create your own vision of the gameplay.
The very first piece of advice is to download Notepad++ since it offers really good and simple editing once you are done with creating your file. It’s needless to say that it is completely safe and is tested by millions of satisfied users from countries from all over the planet. It also does not take much of your computer memory, so won’t have to worry about that as well.
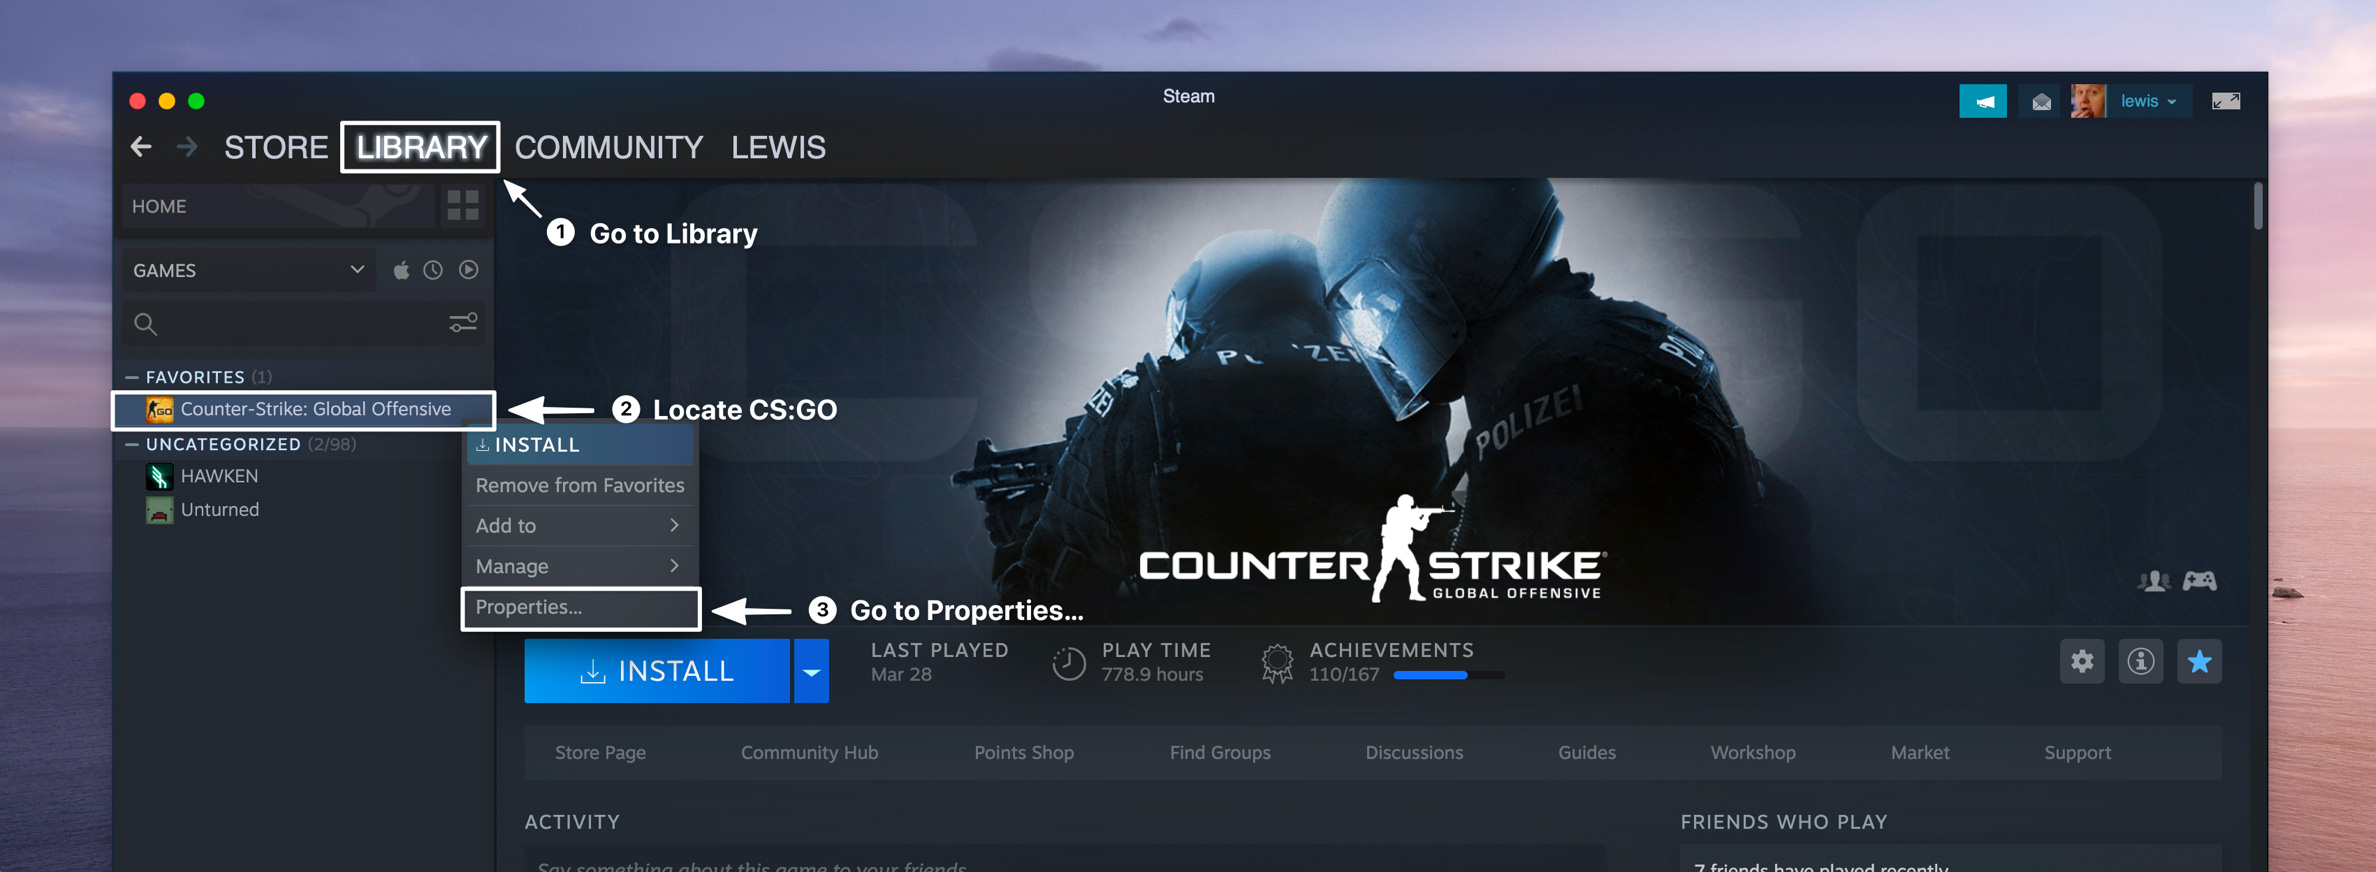
- Open the CSGO configuration folder. You can access it through Steam library-right-click CSGO – Properties – Browse local files.
- Select and open the CSGO folder-then open the “cfg” folder.
- Create a new text document and name it “autoexec.txt”
- Select and open your document and fill it with the commands you have in mind. Feel free to choose any of them, since there are no limitations when it comes to the number of commands you can use. Your personal wishes are the only criteria.
- Type “host_writeconfig” in the last line of the document
- Save your file as “autoexec.cfg” and place it into “All Files”
- Your file is good to go. Open the Steam library, go to CSGO, and select Properties. Click on “Set launch options”, and add your file by writing “+exec autoexec.cfg”. Press OK and you are ready to play the game. Enjoy!
Now that you’ve learned a lot about CSGO launch options and the ways to automate the configuration of your favorite commands, perhaps there will be much more to experience and explore as you go through the battles ahead of you. Every map has its hidden details, and who knows when your brand new configurations might help you be the needle between winning and losing.
Launch Options to Change Game Resolution
If you are having video and display problems while trying to play the game, there are a couple of ways you can change your settings so you don’t face the same issues again.
Your best bet is changing your resolution with launch options. The procedure is similar to other options. You login into your Steam account and go to Steam library-Properties-Set launch options. Then you just need to write the resolution changes that you want, for example, 1920×1080 (you are free to choose any of the resolutions available).
